> For the complete documentation index, see [llms.txt](https://docs.siit.io/llms.txt). Markdown versions of documentation pages are available by appending `.md` to page URLs; this page is available as [Markdown](https://docs.siit.io/core-platform/integrations/email.md).
# Email
Employees submit requests by emailing your team address, like it\@acme.siit.io, and reply to any Siit update to add details. Every message lands on the request timeline
### Submit requests via email
#### How it works
**Your team's email address:**\
If your organization is Acme and you want to submit a request to your IT team, simply send an email to:
```
[team-name]@acme.siit.io
```
For example: `it@acme.siit.io` or `hr@acme.siit.io`
**What happens next:**
1. Your email is received by Siit
2. A new request is automatically created
3. You receive a confirmation with your request details
4. The appropriate team is notified and can start working on your request
**Writing to several teams at once:**
Put two of your Siit addresses on the same email — `it@acme.siit.io` and `hr@acme.siit.io`, in **To** or in **Cc** — and each team gets its own request in its own inbox. Neither team sees the other's thread, and each one works and closes its request independently. Replies follow the same rule: a reply sent to one address lands on that inbox's request.
Learn [how to submit requests via email](https://help.siit.io/email-request)
***
### Add information to existing requests
Need to provide more details, ask a follow-up question, or just let the team know they're doing an awesome job? Simply reply to any email update you receive from Siit.
#### Reply to updates
When you reply to a Siit email notification:
* Your message is automatically added to the request thread
* The assigned team members are notified
* All context is preserved in one place
* No need to log into any platform
***
### Reply format
Each of your email addresses has its own reply format, in **Settings → Channels → Email →** the address **→ Email format**. It decides what someone who writes to that address gets back when an agent answers.
* **Siit format** — the reply carries the request reference, its status and a link to follow the request.
* **Plain email** — only the agent's message, sent in the original thread, like an email written by hand. **Plain email** is a Pro feature.
**Confirmation email** sits on the same page. Turn it on to let requesters know automatically that their email was received. A confirmation email mentions a request number, so keep it off when you want a fully neutral experience with **Plain email**.
***
### Configure email sending
Siit offers two options for sending emails on behalf of your company domain. Each has its own benefits and considerations.
#### Option 1: Individual email address verification
**Best for:** Quick setup, small teams, or testing
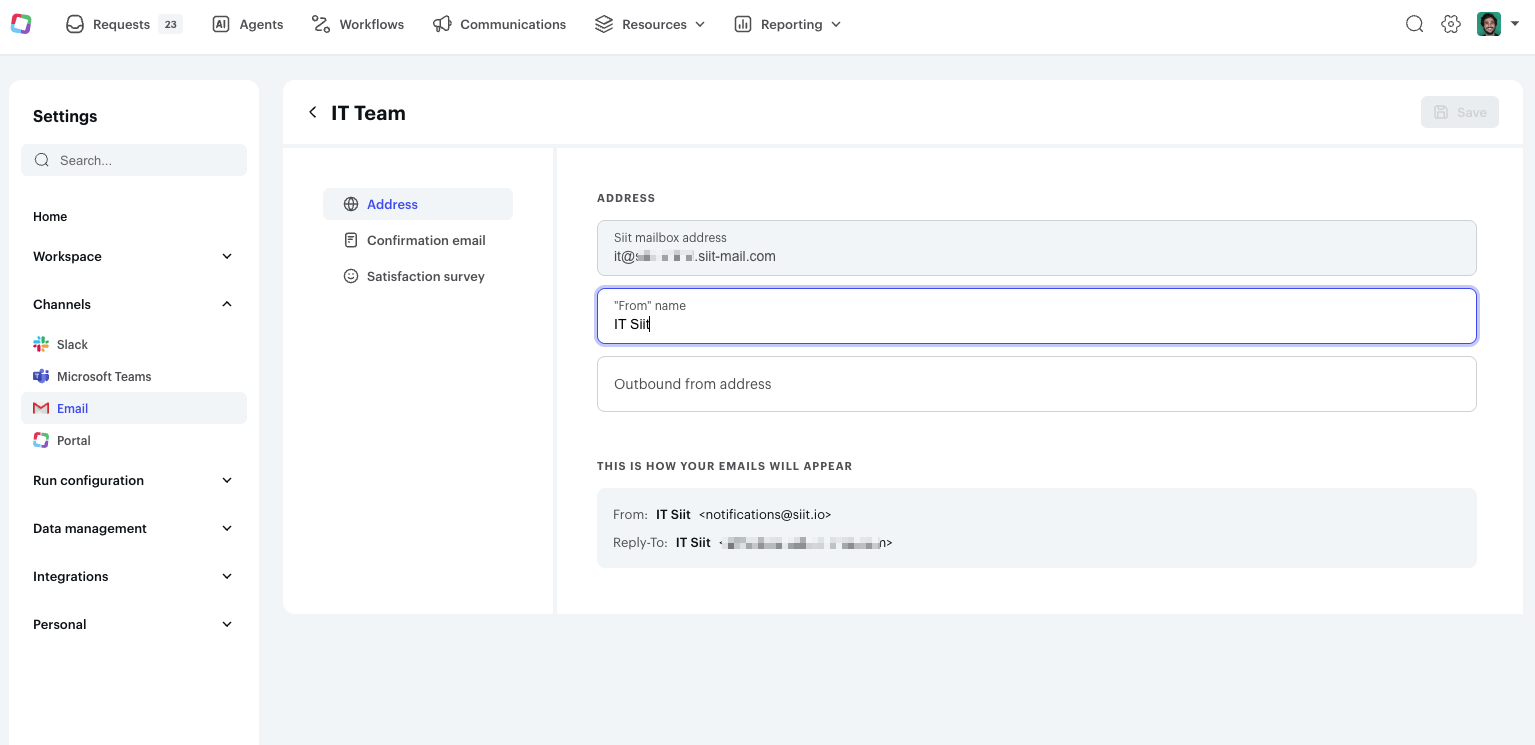
Personalize both the "From" name and email address with this simple implementation:
**Setup steps:**
1. **Provide information:** Enter your desired "From" name and email address in Siit's Email settings
2. **Verify your address:** You'll receive a verification email from Postmark
3. **Confirm:** Follow the verification steps in the email to confirm your address
4. **Start sending:** Once verified, Siit can send emails from your address
**✅ Benefits:**
* ⚡ Quick and easy setup
* No DNS configuration required
* Perfect for individual users or small teams
**⚠️ Considerations:**
* Each sending email address needs individual verification
* May affect email deliverability compared to domain authentication
* Recipients might see "via postmarkapp.com" tags in Gmail
* Outlook may show "on behalf of" indicators
***
#### Option 2: Fully-authenticated domain (Recommended)
**Best for:** Organizations prioritizing deliverability, brand consistency, and professional appearance
Authenticate your entire company domain for a fully-branded, secure email experience.
**Setup steps:**
**1. DNS Record Setup**
Add specific DNS entries to your domain configuration to verify ownership. You'll need to add these records (provided by your Siit CSM):
* **DKIM record:** Authenticates that emails are genuinely from your domain
* **Return-Path record:** Improves deliverability and tracking
* **Custom tracking domain (optional):** For branded link tracking
**2. Reach out for approval**
Contact your Siit Customer Success Manager to approve and activate the domain once DNS records are configured.
**3. Verification**
Siit will verify your DNS setup and confirm when your domain is ready to use.
**✅ Benefits:**
* 🚀 **Superior deliverability:** DMARC alignment and domain reputation
* 🎯 **Professional appearance:** No "via" or "on behalf of" tags
* 🔒 **Enhanced security:** Full SPF, DKIM, and DMARC authentication
* 📊 **Better analytics:** Complete visibility into email performance
* ✨ **Consistent branding:** All emails appear directly from your domain
**⚠️ Considerations:**
* Requires DNS configuration access
* Initial setup takes longer than individual verification
* Needs coordination with IT or domain administrator
---
# Agent Instructions
This documentation is published with GitBook. GitBook is the documentation platform designed so that both humans and AI agents can read, navigate, and reason over technical content effectively. Learn more at gitbook.com.
## Querying This Documentation
If you need additional information that is not directly available in this page, you can query the documentation by asking a question.
Perform an HTTP GET request on the following URL with the `ask` and `goal` query parameters:
```
GET https://docs.siit.io/core-platform/integrations/email.md?ask=&goal=
```
`ask` is the immediate question: it should be specific, self-contained, and written in natural language.
`goal` is what the user is ultimately trying to achieve, the reason they need the answer. Sharing it helps GitBook give you a better, more relevant answer. A goal is most helpful when it describes the outcome the user wants rather than restating the question. For example, with `ask=how do I create an API token`, a goal like `automate deployments from our CI pipeline` lets GitBook tailor the answer to that use case.
The response will contain a direct answer to the question and relevant excerpts and sources from the documentation.
Use this mechanism when the answer is not explicitly present in the current page, you need clarification or additional context, or you want to retrieve related documentation sections.